Click the “Loan” tab at the side bar navigation, and then click on “Apply For Loan”.

Figure 4.8a – Apply For Loan sidebar navigation
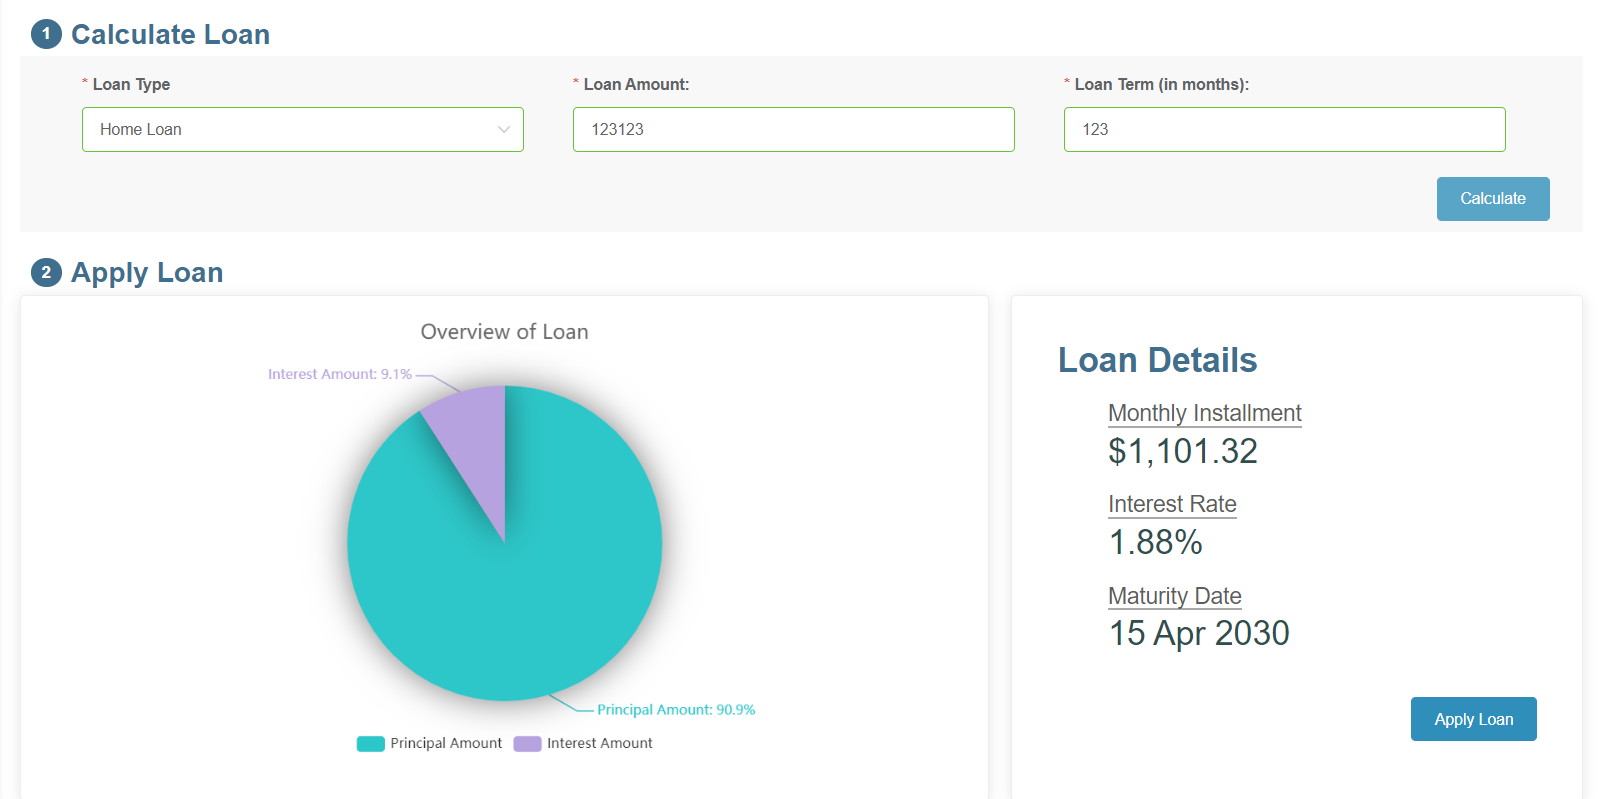
Select the “Loan Type”, enter the “Loan Amount”, and the “Loan Term” (in months), and then click on “Calculate”. Re-calculate if with different parameters if needed, and then click “Apply Loan”.

Figure 4.8b – New Loan
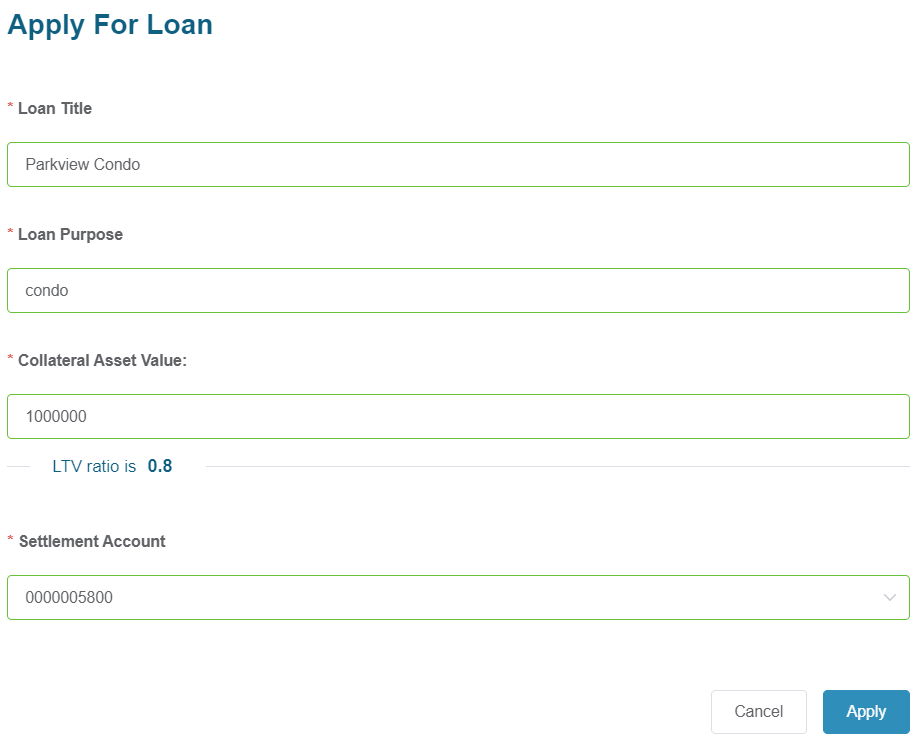
A popup will be shown, prompting the customer to enter; a) the title of the loan which can be a number (eg; 000123) or the name of the property, eg; “Parkview Condo”, and b) the asset value, eg; the sale price of the property. Note: The max loan to value ratio is verified.

Figure 4.8c – New Loan Details
The loan is created in the system, but in “Pending” status. To confirm this, click on “View Accounts”, expend the section labelled “Loan Accounts”, and scroll down to the newly created account. The new account will have the word “Pending” in red colour labelling the left side of the row. The customer is then expected to visit the RM at the scheduled meeting time, and submit documents to support the credit evaluation, eg; proof of employment, proof of income, proof of residency, etc..

Figure 4.8d – Loan Pending Approval in Retail Internet Banking
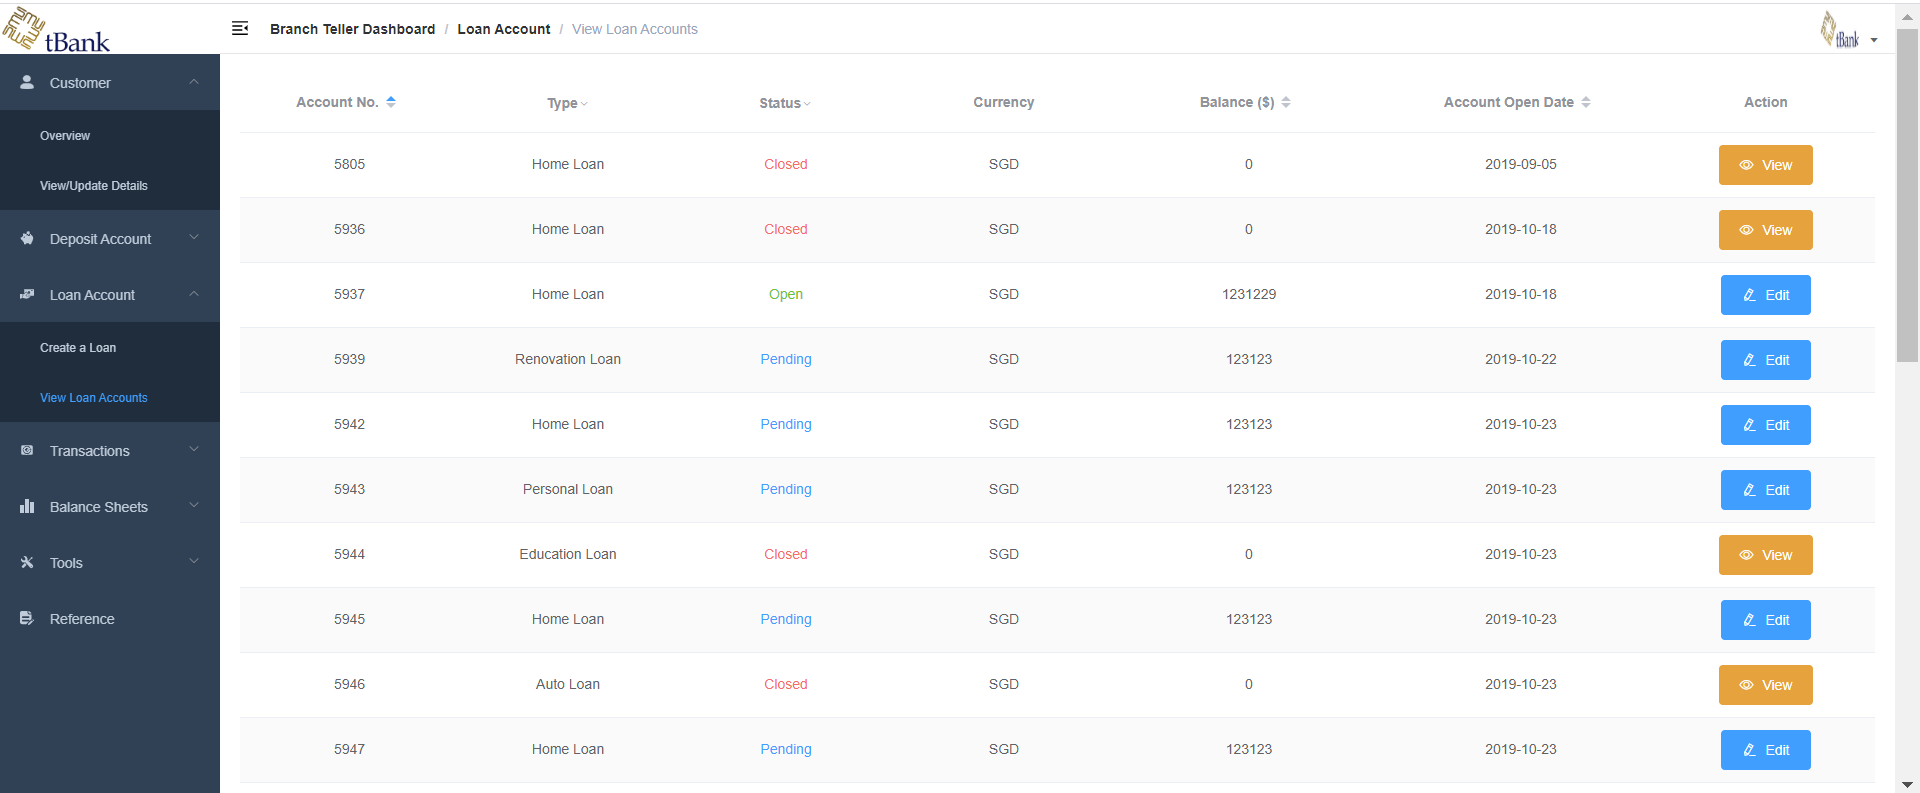
The RM will use the Retail Branch Teller application to perform the credit approval step on the loan “Pending” for approval, using the View Loan Accounts feature. In the list of loan accounts for the customer, the RM will click on the new loan item with a status of “Pending”. A popup will be displayed to enter further information supporting the credit evaluation, the loan is either automatically approved if the credit scoring passes, otherwise the RM can manually approve the loan.

Figure 4.8e– Loan Pending Approval in Retail Branch Teller
Created with the Personal Edition of HelpNDoc: Write eBooks for the Kindle