Click the “Fund Transfer” tab at the side bar navigation. There are 3 types of fund transfers that the customer can make:
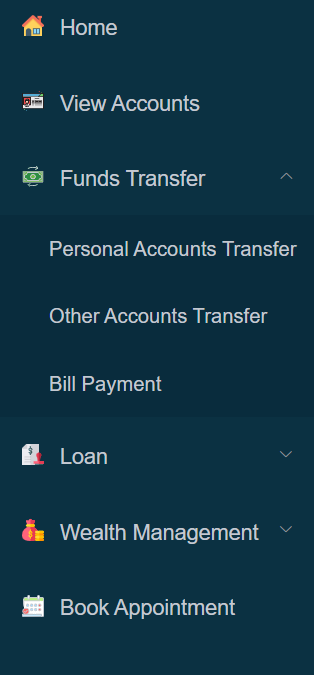
Figure 4.9 – Fund Transfer side bar navigation
Click the "Funds Transfer" tab at the side bar navigation, and then click on “Personal Accounts Transfer”. Figure 4.9.1a below shows the "Personal Accounts Transfer" page. As you can see, there are two tabs. The "Payee" and "Standing Instructions" tabs.
Payee tab
At the payee tab, user can click on the "Add Payee" button to add a payee. When the "Add Payee" button is clicked, a pop up modal will be shown as seen in Figure 4.9.1b Then, all the payee will be shown to the user.
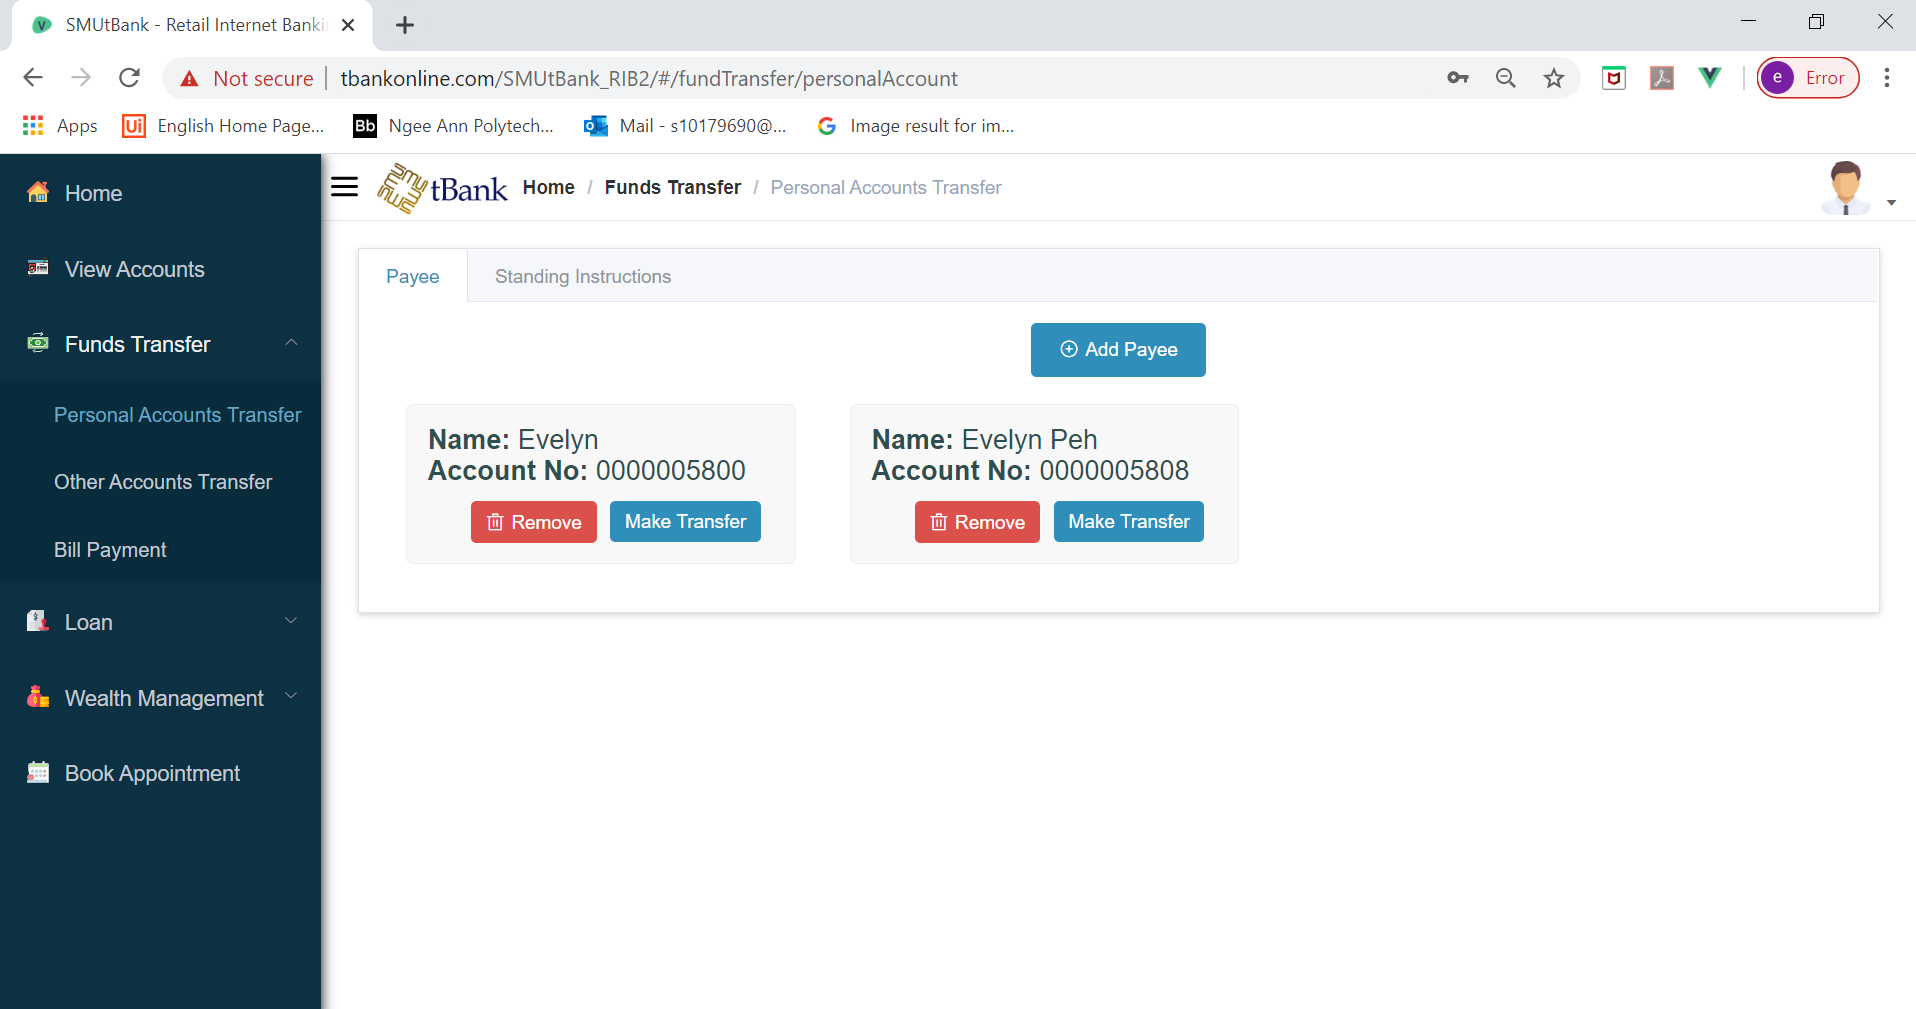
Figure 4.9.1a – View all Payee
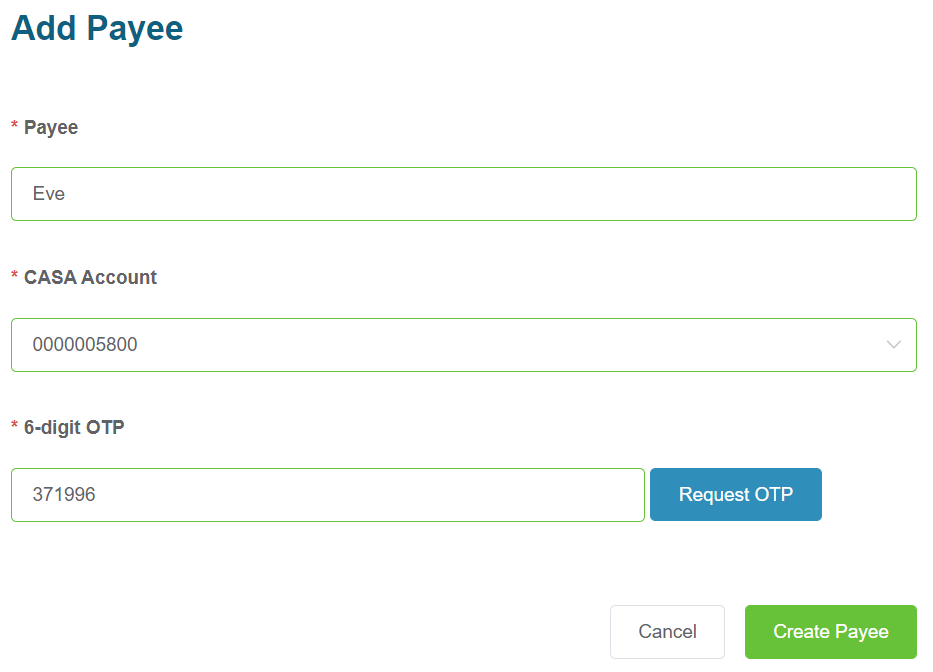
Figure 4.9.1b - Add Payee
After adding a payee, user can select an account to transfer by click on the "Make Transfer" button. When the "Make Transfer" button is clicked, a pop-up modal will be shown as seen in Figure 4.9.1c. User must select the “Account From” and the “Amount” to send. Figure 4.9.1c shows the selection of an USD account as source account, in order to demonstrate a foreign exchange in this example. Select “Transfer Type” from the following list of options:
Figure 4.9.1c sets up an “Immediate” fund transfer. Click “Submit” to execute the transfer.
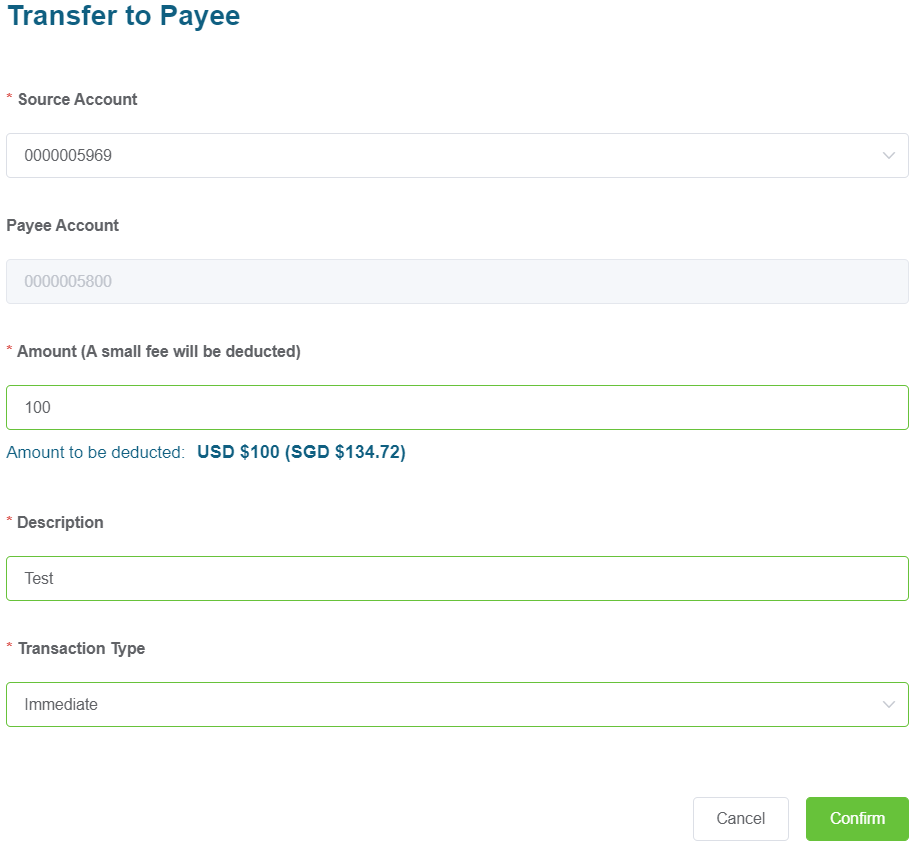
Figure 4.9.1c – Selecting My Account to send from
Viewing the transaction history for both accounts, the SGD account is credited the amount in SGD and the USD account is debited the amount in USD, as shown in Figures 4.9.1d and 4.9.1e

Figure 4.9.1d – Transaction History for Payee (SGD)

Figure 4.9.1e – Transaction History for Source Account (USD)
Standing Instructions tab
At the "Standing Instructions" tab, users can view, edit or delete their standing instructions. It will be consider as a Standing Instruction if the user set the “Transfer Type” as "Monthly", "Weekly" or "Future" when making a transfer.
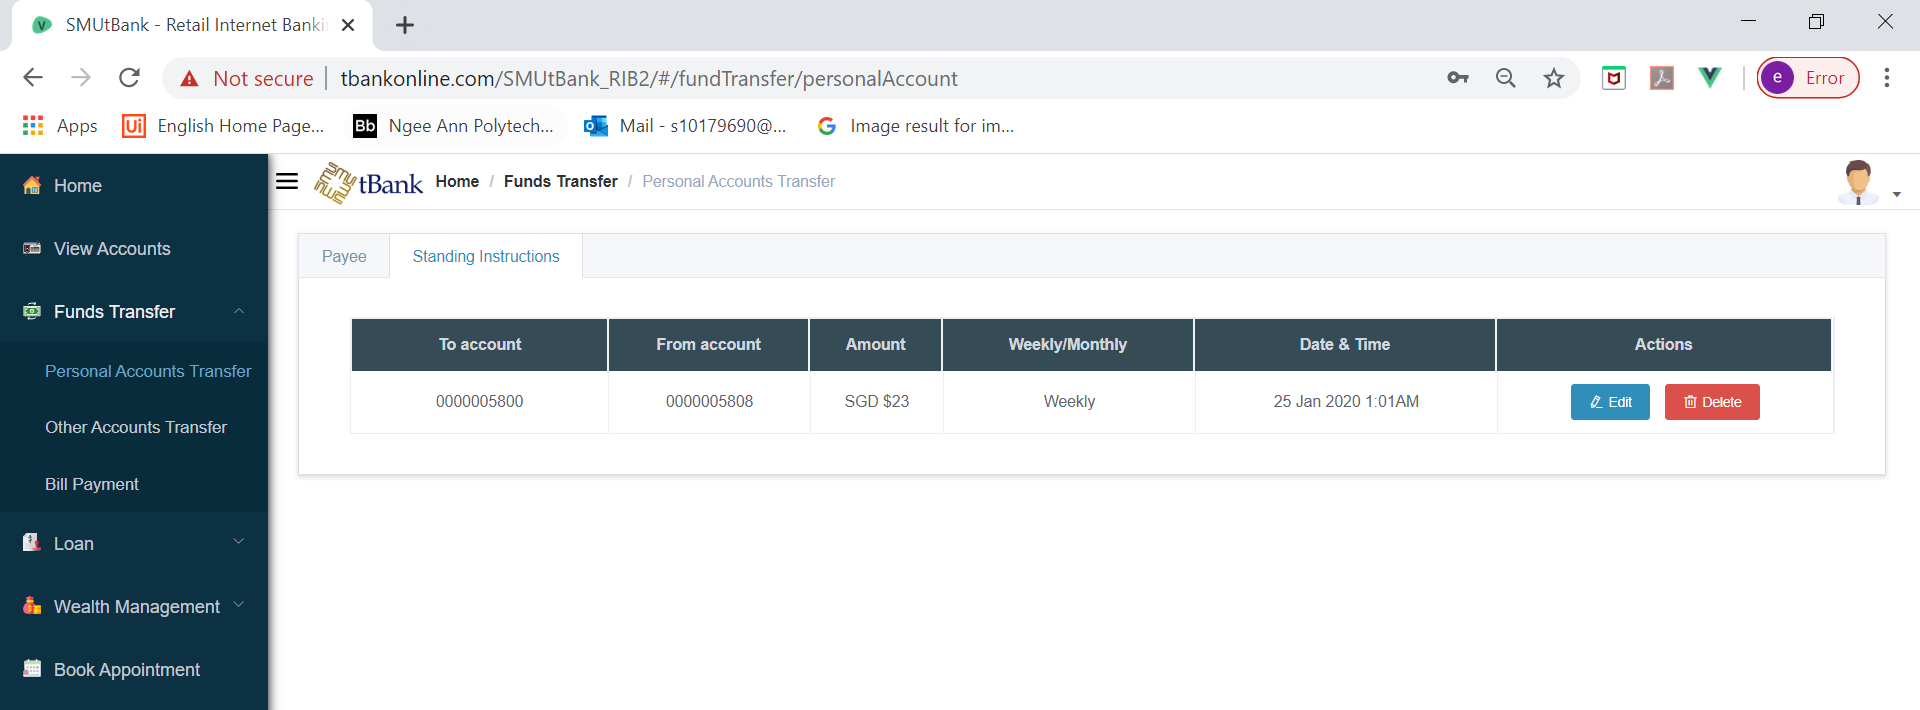
Figure 4.9.1f – Standing Instructions
Fund Transfer to Other Accounts and Standing Instructions
Click the "Funds Transfer" tab at the side bar navigation, and then click on “Other Accounts Transfer”. The figure below shows the "Other Accounts Transfer" page. As you can see, there are two tabs. The "Payee" and "Standing Instructions" tabs.
Payee tab
At the payee tab, user can click on the "Add Payee" button to add a payee.When the "Add Payee" button is clicked, a pop up modal will be shown as seen in Figure 4.9.2b Then, all the payee will be shown to the user.
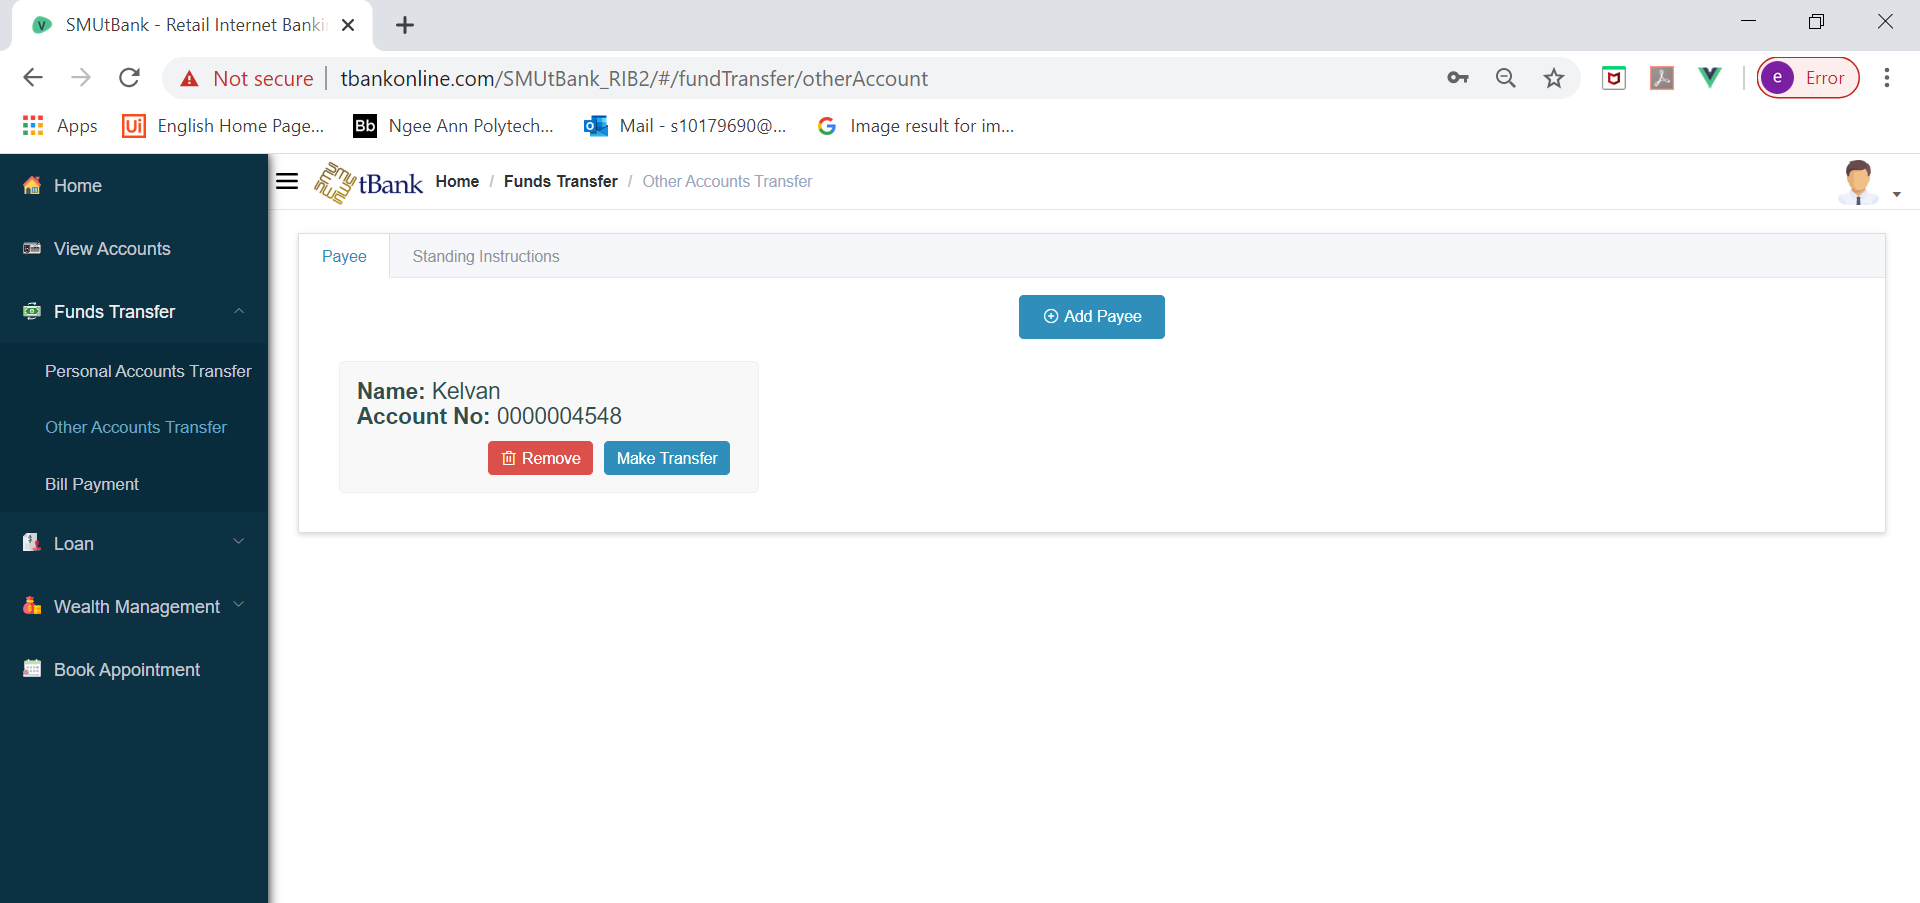
Figure 4.9.2a – Add Beneficiary (Payee)
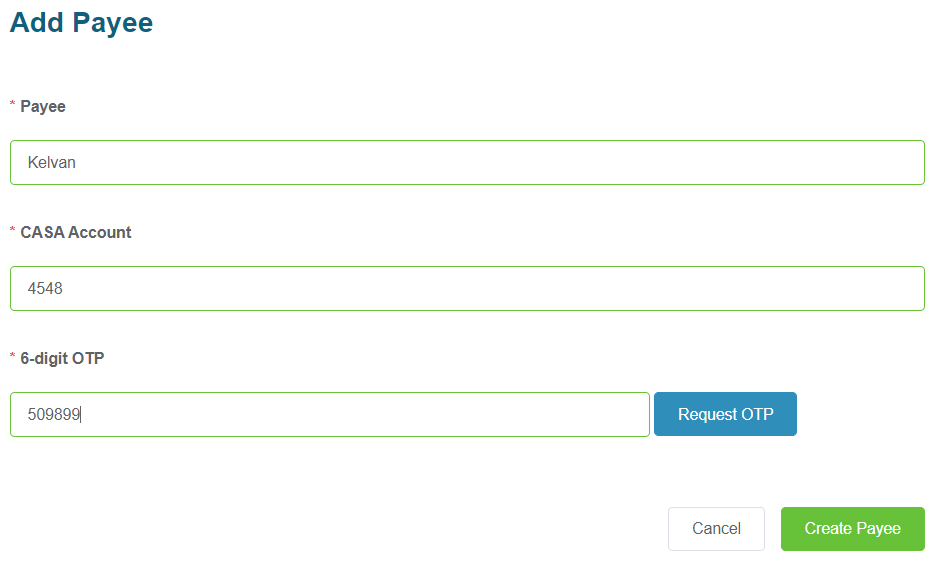
Figure 4.9.2b – Add Beneficiary (Payee)
After adding a payee, user can select an account to transfer by click on the "Make Transfer" button. When the "Make Transfer" button is clicked, a pop-up modal will be shown as seen in Figure 4.9.2c. Users must select the “Account From” and the “Amount” to send. Figure 4.9.2c shows the selection of an USD account, in order to demonstrate a foreign exchange in this example. Select “Transfer Type” from the following list of options:
Figure 4.9.2c sets up an “Immediate” fund transfer. Click “Submit” to execute the transfer.
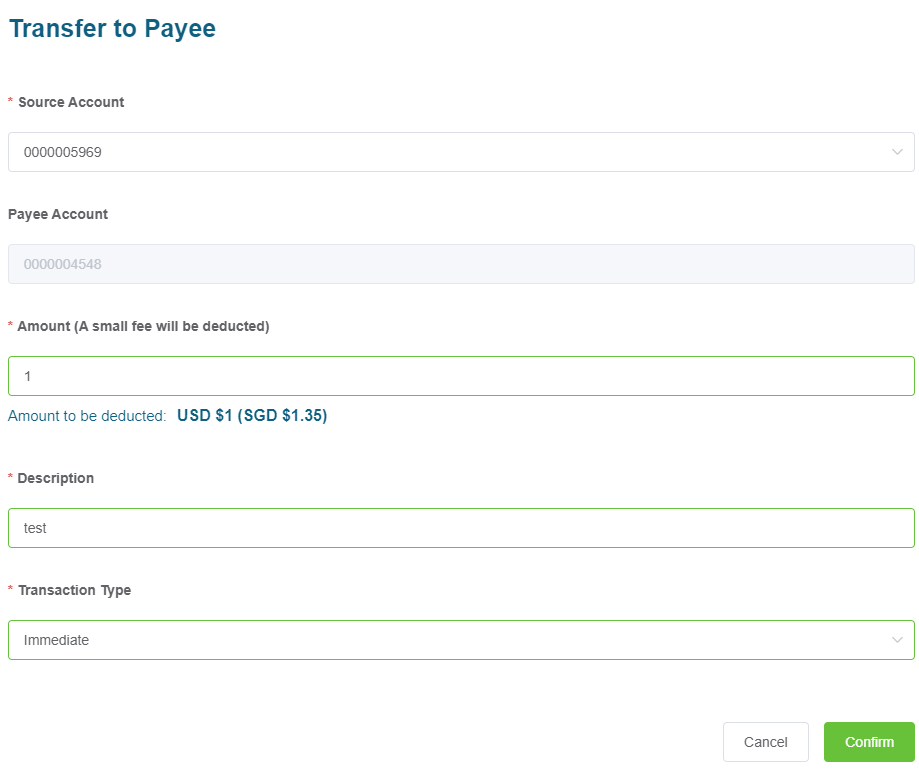
Figure 4.9.2c – Make Transfer
Viewing the transaction history for both accounts, the SGD account is credited the amount in SGD and the USD account is debited the amount in USD, as shown in Figures 4.9.1d and 4.9.1e

Figure 4.9.2d – Transaction History for Payee (SGD)

Figure 4.9.2e – Transaction History for Source Account (USD)
Standing Instructions tab
At the "Standing Instructions" tab, users can view, edit or delete their standing instructions. It will be consider as a Standing Instruction if the user set the “Transfer Type” as "Monthly", "Weekly" or "Future" when making a transfer.

Figure 4.9.2d – Add Beneficiary (Payee)
Click the "Funds Transfer" tab at the side bar navigation, and then click on “Bill Payment”. Figure 4.9.3a below shows page after "Bill Payment" is clicked. As you can see, there are three tabs. The "Bill Payment", "Standing Instructions" and "GIRO Authorizations" tabs.
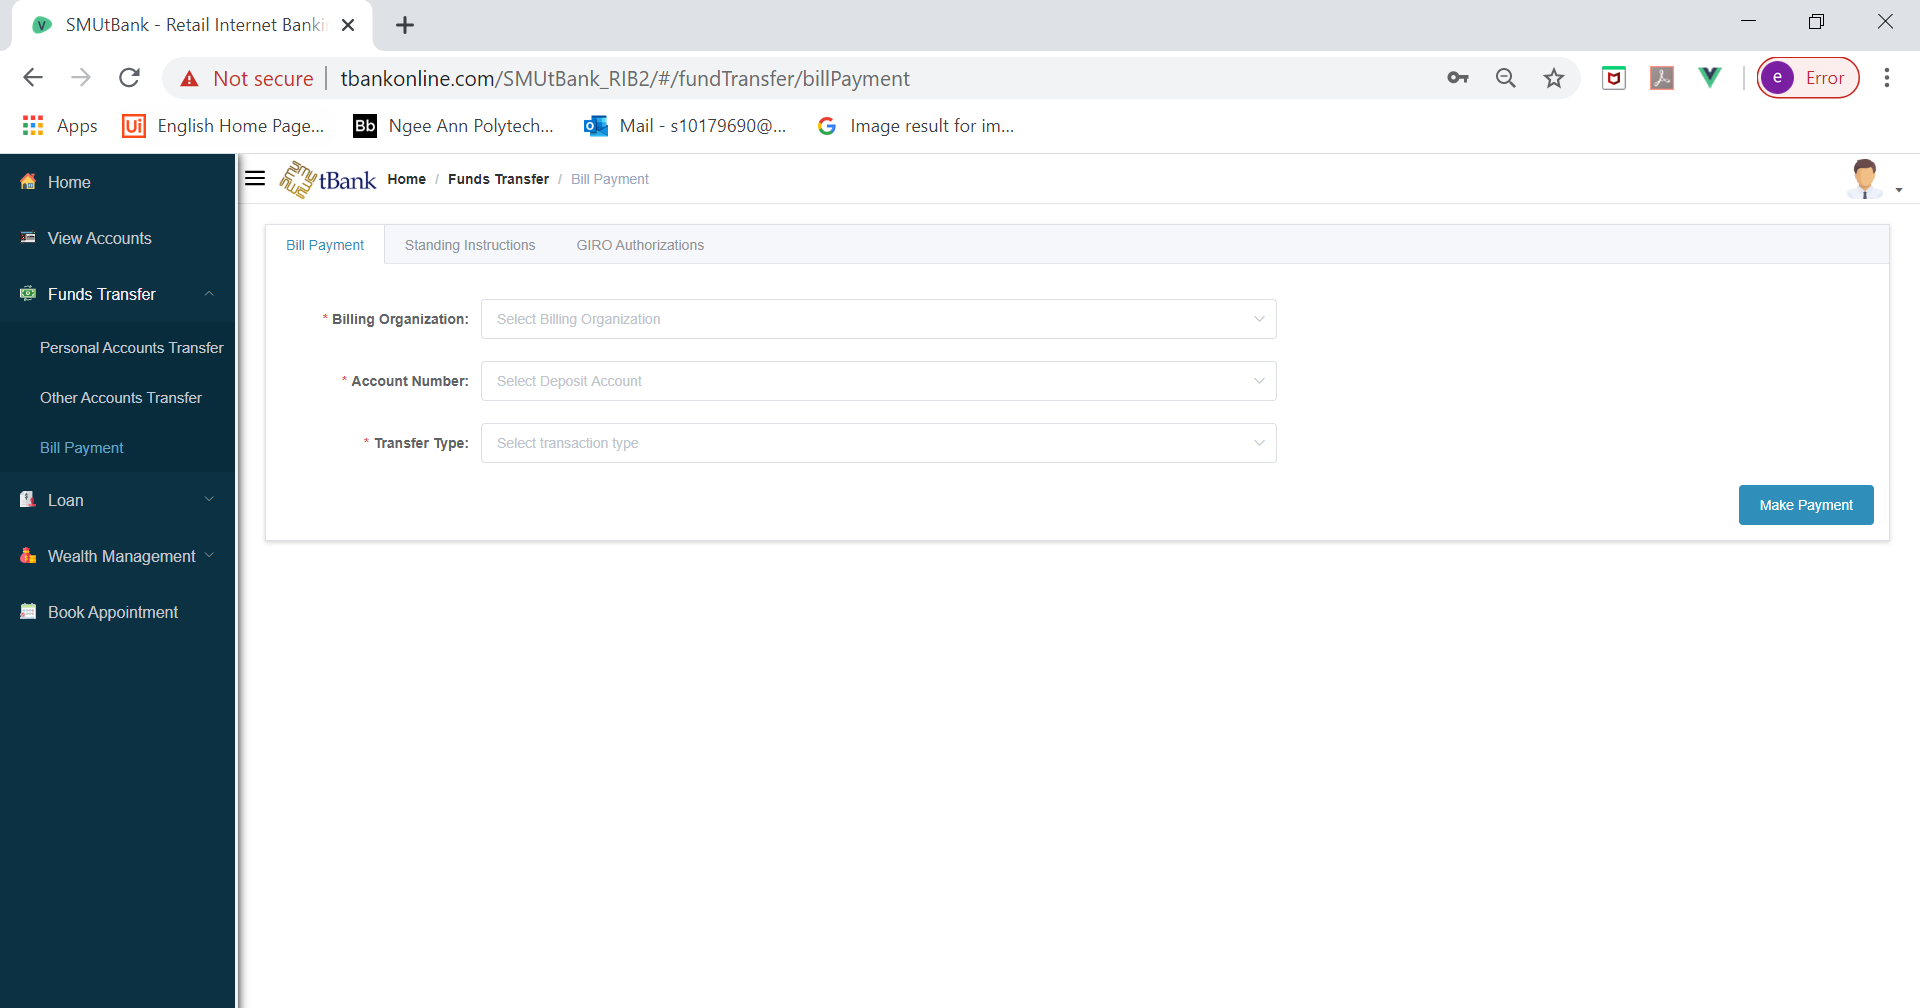
Figure 4.9.3a – Bill Payment page
Bill Payment tab
Under the "Bill Payment" tab, the user are allowed to make payment to certain Billing Organisations. Select the "Billing Organisation", “From Account”, select the “Transfer Type” as “Immediate”, enter the “Amount” of the bill, and enter the “Invoice No.” from the bill. Click “Submit” to execute the payment.

Figure 4.9.3b – Bill Payment tab
The user will be redirected to the Summary Details for Bill Payment page after the "Make Payment" button is clicked. The user can double check the details before clicking on the "Confirm" button. Payment will be processed after the "Confirm" button is clicked.

Figure 4.9.3c – Bill Payment Details page
The account’s transaction history will now be reflected in the CASA Account’s Transaction History, with the description including the type of transfer.

Figure 4.9.3d – Transaction History for Source Account
Standing Instructions tab
At the "Standing Instructions" tab, users can view, edit or delete their standing instructions. It will be consider as a Standing Instruction if the user set the “Transfer Type” as "Future" when making a bill payment.

Figure 4.9.3e – Standing Instructions
GIRO Authorizations tab
At the "GIRO Authorizations" tab, users can view and delete their GIRO Authorizations. It will be consider as a GIRO Authorization if the user set the “Transfer Type” as "GIRO" when making a bill payment.

Figure 4.9.3f – GIRO
Created with the Personal Edition of HelpNDoc: Free CHM Help documentation generator